
Buying your first set of spurs can feel weirdly high-stakes. On one hand, spurs are a classic piece of western gear and a legitimate communication tool. On the other hand, you’ve probably heard (or seen) stories of someone “jabbing” a horse by accident and creating more problems than they solved.
This guide is written for the true first-timer: you’ve never owned spurs, you’ve never ridden in spurs, and you want to make a smart, horse-friendly purchase.
If you haven’t read it yet, start with our background article on why cowboys wear spurs and the different types out there. It’ll give you helpful context... now let’s get into it.
First: What spurs should do (and what they shouldn’t)
A beginner-friendly way to think about spurs:
Your leg is the cue.
The spur is a refinement tool, like a sharper pencil—not a stronger hammer.
Spurs are not meant to:
make a horse “go” that ignores your legs,
replace training,
punish a horse,
or compensate for unsteady lower legs.
Improper use of spurs can irritate, distract, or annoy the horse, and may even dull your horse or lead to injury.
Spurs are meant to:
help you be more precise (especially laterally),
back up a cue the horse already understands,
and reduce how much you have to move your leg to get the same response.
Spurs are primarily used to communicate with horses and should be used to deliver targeted, impulsive aids rather than to make a horse go faster.
If you’re still building an independent seat and quiet legs, your goal should be a spur that forgives mistakes.
The use of spurs has to be practiced, otherwise your horse may react in a way you don't want, leading to your animal (or you) getting injured.
Should a beginner even wear spurs?
Sometimes yes. Often “not yet” is the right answer.
Consider waiting if:
your lower leg swings, bounces, or grips when you get nervous,
you’re still figuring out consistent leg placement,
you tend to pinch with your knees and your heel pops up,
you ride a sensitive horse that overreacts to accidental contact. Sensitive horses may benefit from milder spurs, such as ball-shaped or rounded spurs, or even dummy spurs, which are designed to familiarize both horse and rider with spurs without causing sharp contact.
Consider spurs (with instruction) if:
you ride with a coach who’s guiding you,
your horse already understands basic leg cues,
your legs are reasonably steady,
you’re working on more refined cues (like moving shoulders/hips, shaping circles, straightness, etc.).
No shame either way. Spurs aren’t a “level-up badge.” They’re just a tool—and tools work best when your hands (and legs) are ready.
The 6 beginner-friendly traits you should prioritize
When people ask “best spurs for beginners,” they often expect a list of brand names. Brands matter, but design matters more—and your first pair should be chosen for safety, softness, and fit. The most important thing is to choose spurs made of high-quality materials (such as stainless steel) to reduce the risk of injury and ensure durability.
Here are the traits that most consistently make sense for new spur users.
Optimal fit is crucial for comfort and safety, and style can also be considered, provided it does not compromise function.
Fit: Spurs should fit your boot securely and comfortably. Key features to look for in beginner spurs include a secure fit, appropriate length for leg position, and stainless steel construction. Spurs from reputable brands like Professional's Choice are made of high-quality stainless steel for durability and shine, with a no-rust finish.
1) Short shank (safer, more forgiving)
For beginners, shorter shanks reduce accidental heavy contact while you’re learning where your leg naturally sits and how to move it with intention.
A shorter shank generally requires more deliberate contact.
A longer shank can “find the horse” even when you didn’t mean it to.
Rule of thumb:
Start short. If you’re tall/long-legged and you ride in a way where your heel naturally sits farther from the horse, you might need a slightly longer shank—but “slightly” is the key word.
2) Smooth or mild rowel (no sharp points)
For a first-time spur buyer, avoid anything that appears capable of shredding paper.
Beginner-friendly rowel options typically include:
Smooth rowels (rounded edges)
Mild, larger-diameter rowels that roll easily and don’t “bite”
Cloverleaf spurs or cloverleaf-roweled spurs—these have a mild rowel configuration and are among the mildest rowel types available, making them highly recommended for beginners
Ball-end spurs (a rounded end instead of a rowel)—often considered very beginner-appropriate when used correctly
Bumper spurs and other mild, short-shanked rowel spurs
Blunt or rounded designs, such as round end spurs, rounded spurs, and blunt rowel spurs, are intended to ensure gentleness and avoid sharp pokes. Cloverleaf or blunt rowel spurs have short shanks with round-edged wheels that roll along the horse's side, making them mild and gentle.
The best spurs for beginner horseback riders are short-necked, blunt, or rounded, providing gentle cues without causing pain. Prince of Wales spurs are also common among English riders and feature a flat, blunt, or rounded end.
Avoid (for now):
sharp or thin-pointed rowels,
aggressive “teeth,”
or anything marketed as “extra bite,” “rough,” or “competition edge.”
Your first pair should feel like: “I can learn with this without accidentally overdoing it.”
3) Proper boot fit (this matters more than most people think)
Bad fit causes:
slipping spurs (which leads to unpredictable contact),
twisting (which can create accidental pokes),
and you are constantly adjusting them mid-ride.
A good beginner spur:
sits centered on the boot heel,
stays level (not drooping downward),
doesn’t pinch your boot or wobble side-to-side.
The proper fit of spurs is essential for both comfort and safety. Spurs should be tried on with the boots you plan to wear while riding to ensure optimum fit. Proper fit is crucial for spurs, ensuring they sit comfortably on the heel without pinching or slipping.
If the spur doesn’t stay put on your boot, it’s not “your fault.” It’s usually the wrong fit or incompatible with your boot's heel shape.
4) Comfortable heel band
Heel bands come in different widths and shapes. As a beginner:
choose a heel band that sits comfortably and doesn’t dig into your boot,
avoid anything overly stiff that feels like it’s fighting your boot shape.
Comfort matters because discomfort causes riders to fidget, and fidgeting makes their legs less steady.
5) Quality strap (secure, adjustable, not stretchy)
A strap that loosens is a safety issue.
Look for:
sturdy leather or durable synthetic,
a buckle that adjusts easily,
enough holes to fine-tune fit.
For safety reasons, spur straps should be replaced immediately upon signs of excessive wear.
Spur straps are available in various materials and designs, including leather and nylon, and are essential for securing spurs to your boots while complementing your riding style.
Avoid:
overly stretchy material,
straps that are too thin and prone to twisting.
If your spur keeps slipping down, the strap is often part of the problem. Some spurs, such as bumper spurs, use rubber-coated bands to protect boot leather and improve stability. Rubber can also be used as a protective covering on spurs to safeguard boot leather and provide extra grip.
6) Simple design, not “statement spurs”
This is not the time for dramatic, heavy, oversized, or ultra-decorative spurs. Those can:
be heavier (more swing),
be more awkward to position,
or create more contact than you intend.
Your first spurs should be boring in the best way.

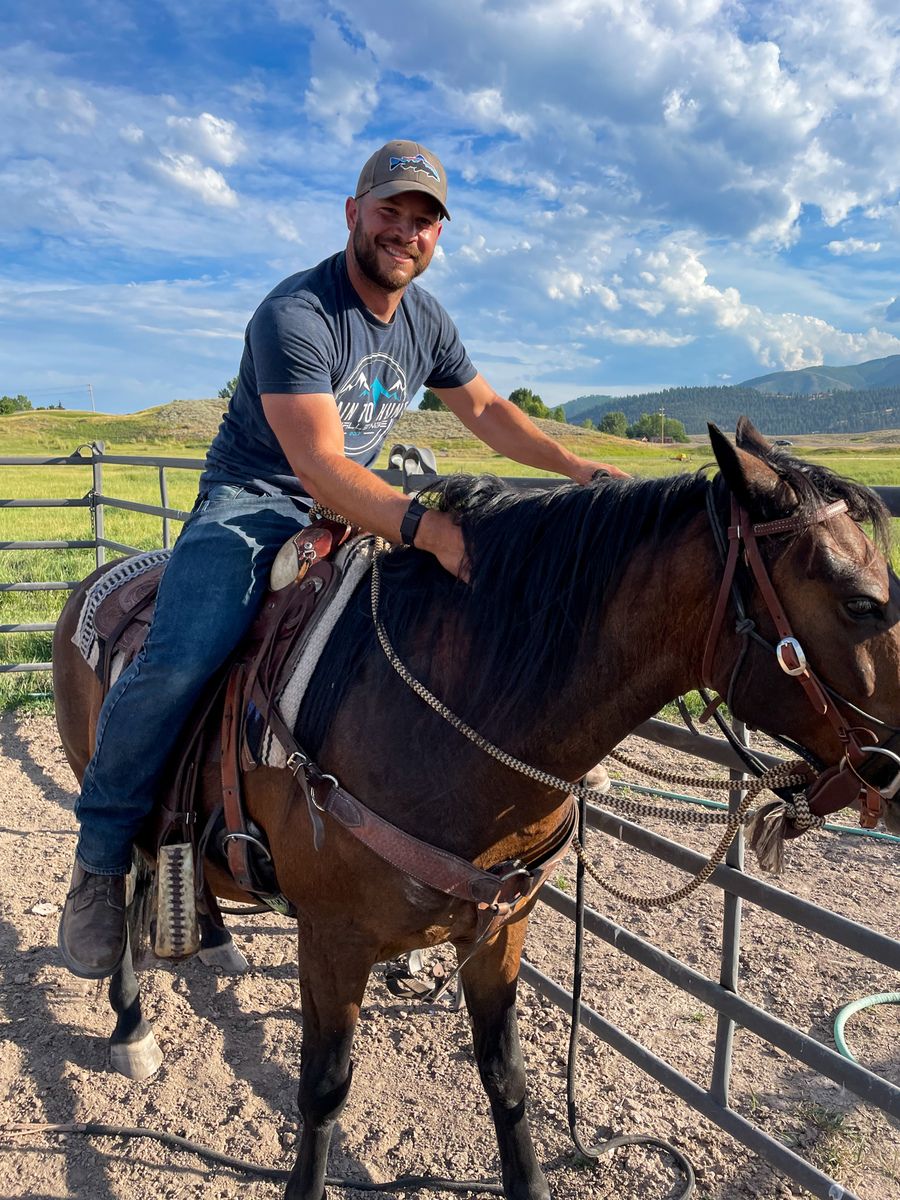
These are the Professional's Choice spurs I decided to go with for my first set.
Shank length for beginners (the practical breakdown)
Shank length is one of the biggest “beginner vs. advanced” separators.
Why shorter shanks help beginners
Short shanks generally:
require more intentional movement,
reduce accidental contact,
and give you time to learn correct leg mechanics.
When a slightly longer shank can make sense
If you’re a longer-legged rider—especially on a wider horse—or you ride in a way where your heel naturally sits farther from the horse’s barrel, a slightly longer shank may provide more consistent, light contact without requiring you to dramatically change your position.
But a longer shank should never be used to “reach the horse” because you’re riding with your leg too far off the horse. Position first. Equipment second.
What “short” usually means
Rather than obsessing over exact measurements, shop by category:
Short shank: best starting point for most beginners
Medium shank: only after you can demonstrate steady legs and intentional contact
Long shank: not a beginner tool in most cases
If you have a trainer, ask them to watch you ride at the walk and jog/lope (or trot/canter) and tell you whether your leg stays quiet enough for spurs—and if so, what shank length matches your leg position.
Rowel types: what beginners should choose (and why)
Rowels can look intimidating, but the concept is simple: they are designed to roll, providing a clear cue without scraping.
Beginner-friendly rowel characteristics:
Rounded edges
Wider, smoother profile
Easy rolling action
Smooth rowel (mild, forgiving)
A smooth rowel is typically a great first choice. It reduces the chance of “catching” the horse’s side if your leg moves unexpectedly.
Ball-end spurs (often very beginner-friendly)
Ball-end spurs replace the rowel with a rounded ball. They can be a safe way to learn the feel of wearing spurs without introducing a rowel right away.
Avoid aggressive rowels early on
If it looks sharp, jagged, thin, or “grabby,” skip it for your first pair.
Spur fit 101: how to get the right fit on your boots
Fit is where beginners get frustrated. Here’s the fast checklist.
Make sure the spurs are the right size for your boots.
Spurs should be attached to the back of the boots, with the shank end pointing slightly downward for proper use and safety.
The spur should rest just above the heel, not digging into your boot or foot.
Straps should be snug but not tight—enough to keep the spur from slipping, but not so much that it pinches.
Walk around a bit to check for movement or discomfort.
Note: Spurs should be cleaned regularly to ensure they function properly and do not cause discomfort to the horse.
A properly fitted spur should:
sit snugly against the boot heel,
stay centered (not drift to the inside/outside),
rest level (not drooping down),
and not rotate when you walk.
Step-by-step fitting tips
Place the heel band around the boot heel so the spur sits centered.
Attach the strap over the top/front of the boot (in a typical Western setup).
Tighten so it’s snug, but not cutting into the boot.
Walk a few steps.
If it shifts or droops, adjust:
strap tightness,
strap position,
or consider a different heel band shape that matches your boot.
Common beginner fit problems (and fixes)
Spur droops downward: strap is too loose, or spur shape doesn’t match your boot heel.
Spur slides side-to-side: heel band too wide, strap too loose, or boot heel too narrow for that model.
Spur twists inward: strap tension uneven or the spur isn’t seated correctly.
If you can’t make them sit stable, don’t force it. A different spur shape often solves the issue immediately.

Strap material: leather vs. synthetic for beginners
Both can work. Here’s how to choose.
Leather straps
Pros:
comfortable,
molds over time,
classic look.
Cons:
needs occasional care,
can stretch slightly if poorly made.
Synthetic straps
Pros:
durable,
low maintenance,
often more weather-resistant.
Cons:
can feel stiff,
can be less “forgiving” on odd boot shapes.
For beginners, the best strap is the one that keeps the spur stable and adjusts easily.
“Best spurs for beginners” by rider type (quick recommendations)
Instead of naming specific products, use these profiles to choose the right kind of first spur. The right spurs should be selected based on your riding discipline—different styles suit Western, dressage, and leisure riding.
For example, dressage riders often prefer Waterford, Disc, or Swan Neck spurs for their subtlety and compliance with discipline regulations, while Western riders may opt for different shank lengths and rowel types.
Beginner riders should use spurs as reinforcement for leg aids rather than as a primary tool, to ensure the horse’s welfare and promote clear, gentle communication.
If you’re nervous about accidental contact
Choose:
short shank
ball end or smooth rowel
lightweight, simple heel band
If you ride a sensitive horse
Choose:
short shank
smooth, mild rowel (or ball end)
prioritize stable fit so you don’t “bump” by accident
If you’re tall/long-legged
Choose:
short shank first
if needed, move to slightly longer short/medium later
focus on fit and leg position before upgrading shank length
If you ride mostly trails and casual arena rides
Choose:
short shank
mild rowel
comfortable strap and stable fit
If you’re starting in a performance discipline
Choose:
still start mild and short
invest in a quality spur that fits your boots well
let your trainer guide your progression
How to introduce spurs without confusing (or souring) your horse
This matters as much as the purchase.
1) Start on the ground
Wear your spurs while you do simple groundwork. Let your horse get used to the jingle and movement around your boots.
2) First ride: wear them, but don’t use them
On your first ride in spurs:
ride like you normally would,
focus on keeping your leg quiet,
and notice where the spur naturally sits relative to the horse’s side.
3) Practice intentional contact at a standstill
At the halt, practice:
moving your heel away from the horse,
then lightly bringing it to where the spur would make contact,
without swinging your whole leg.
The goal is control, not pressure.
4) Use spurs as a “backup,” not the first ask
Ask with your leg normally first. If you need refinement, apply spur lightly and briefly—then release immediately.
Release is the entire point. Spurs should make your cues clearer, not constant.
Common beginner mistakes (and how to avoid them)
Mistake #1: Buying spurs that are too aggressive
Fix: choose mild rowels or ball ends, avoid sharp points.
Mistake #2: Using spurs to compensate for a dull horse
Fix: address responsiveness through training, timing, and consistency—not stronger equipment.
Mistake #3: Riding with unstable lower legs
Fix: spend time on basic position work before adding spurs. A quiet leg is a kindness to your horse.
Mistake #4: Poor fit that causes unpredictable contact
Fix: prioritize spur/boot compatibility and strap security.
Mistake #5: Constant pressure
Fix: cue → response → release. If you’re holding pressure, your horse can’t learn the difference between “try” and “ignore.”
Care tips to make your first spurs last
Wipe dust/sweat off after rides.
Check rowel movement (it should roll freely if it’s a rowel spur).
Condition leather straps occasionally if you use leather.
Store spurs so they don’t bang around (protects finish and keeps rowels rolling smoothly).
FAQ: beginner spur questions (quick answers)
Are spurs cruel?
They can be if used poorly. They can also be humane and subtle when used with skill. The difference is the rider’s leg control, timing, and intention.
What’s the safest spur for a beginner?
Typically:
short shank
ball end or smooth/mild rowel
proper fit so it doesn’t slip or twist
Do spurs make a horse go faster?
They can increase responsiveness, but they’re not meant to replace forward training. If your horse doesn’t go from a normal leg cue, fix that foundation first.
Can I learn spurs on my own?
It’s possible, but it’s much safer and faster with coaching—especially to prevent accidental cueing and souring your horse.
The bottom line: what to buy first
If you want the simplest “starter spec” for the best spurs for beginners, start here:
Before choosing your first pair, it’s important to know that different types of western spurs are designed for specific purposes in western riding.
Western riders use a variety of spurs, including cloverleaf spurs, barrel racing spurs, roping spurs, and western pleasure spurs, each tailored to their discipline.
Barrel racing spurs feature a bar that wraps around the back of the heel of the boot—this wrap can be smooth or ribbed—providing a secure fit for fast-paced events.
Roping spurs are built with short shanks and small rowels to avoid contact with the horse when the rider stands up to rope, making them ideal for roping events.
Western pleasure spurs are commonly used to slow horses down rather than speed them up, with the ten-point rowel being the most common type for this discipline.
The yoke or wrap of these spurs helps them stay in place on the heel of the boot, ensuring effective communication and comfort for both horse and rider.
Short shank (safer and more forgiving)
No sharp points (ball end or smooth/mild rowel)
Stable, centered fit on your boots
Secure strap that doesn’t loosen
Simple, lightweight design
Then do the real work: ride with quiet legs, use spurs intentionally, and release quickly when your horse responds.