When temperatures drop and ice forms, the question arises: "How do we help horses keep their footing when the ground works against them?"
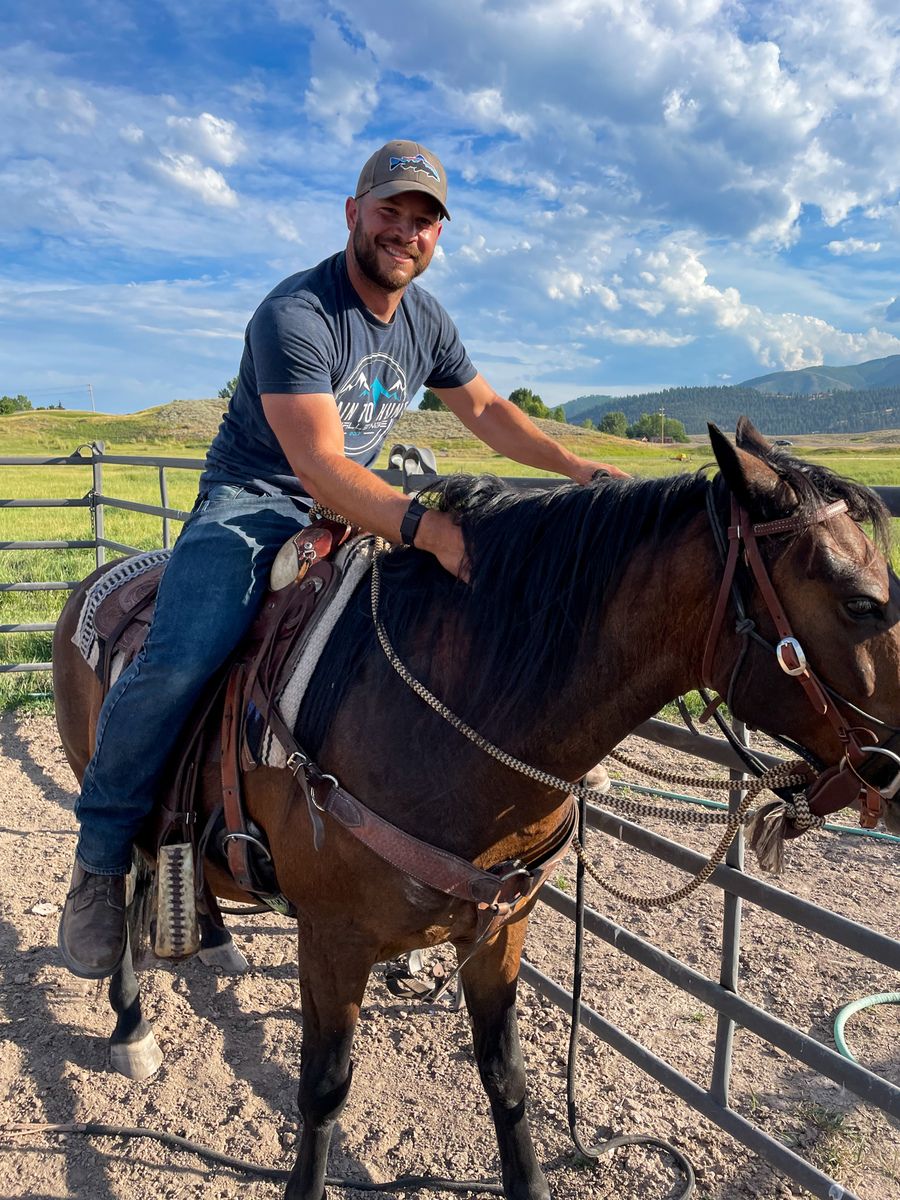
When I first moved to Montana and went hunting in the winter with my future in-laws and their horses, that question was on my mind.
On some of those mountain sides you ride... one false step and bad news bears...
That's when I learned about "sharp shoes" (also known online as horse cleats). But, like so many things in horsemanship, the solution to ice isn’t as simple as slapping on the most aggressive traction shoe you can find.
Quick Answer: What Are Horse Cleats & When To Use Them?
The term “horse cleats” usually refers to studs, calks, borium inserts, and other traction devices added to horseshoes. These devices serve one primary purpose: providing traction when standard shoes can’t grip the ground safely.
For winter use on snow and ice, cleats help prevent slipping. The physics are straightforward—metal projections dig into the ground, increasing friction and giving the horse something to grip.
But here’s what many people don’t realize at first: cleats also increase stress on the horse’s joints and soft tissues. Every bit of extra grip means less natural slide at the end of each stride. That trade-off must be managed thoughtfully, in partnership with a skilled farrier and, when needed, a veterinarian.
Main types of horse cleats include:
Winter studs and calks (screw-in or drive-in for ice and snow)
Borium and Drill-Tek (tungsten carbide hard-surfacing welded to shoes)
Traction nails (specialty nails with textured or carbide-enhanced heads)
Performance cleats (designed specifically for speed events and arena work)
At Aspiring Horseman, we focus on educating horse owners—not selling specific hardware. Our goal is to help you understand how to choose and use cleats safely, so you can have better conversations with your farrier and make decisions grounded in your horse’s actual needs.

How Winter Conditions Affect Horse Hooves
If you’ve ever led a horse across a frozen paddock in January, you know that feeling in your gut. Every step feels like a gamble. The ground that was soft mud last week is now rutted concrete covered in a glaze of ice.
North American winters create a variety of challenging surfaces: frozen ruts that jar joints with every step, packed snow that compacts into slick paths, and glare ice that offers almost zero grip. These conditions fundamentally change how a shod horse moves.
Here’s something important to keep in mind: a small amount of slide at the end of each stride is actually healthy for the limb. It dissipates force gradually rather than transmitting shock straight up through the foot, pastern, and beyond. On hard, slick ground, that controlled slide can turn into a full slip—or worse, a fall that injures horse, rider, or handler.
Common winter problems include:
Slipping on icy lanes during turnout or when being led to the barn
Snowballing (packed ice forming in the sole, which we’ll cover later)
Increased concussion on frozen ground that’s lost all give
Balance issues for riders trying to work horses on unpredictable footing
Think about concrete scenarios: leading your horse to turnout on a January ice crust, hauling to a February clinic and finding an icy parking lot, or trying to ride in an outdoor arena where thaw-freeze cycles have created patches of sheer ice next to soft mud.
Different disciplines face different winter traction needs. A trail horse navigating mountain roads encounters different challenges than a driving horse working on paved yards, or an arena rider who mostly deals with hard-frozen footing. These differences influence which type of cleat makes sense—or whether you need cleats at all.
Types of Winter Horse Cleats & Traction Devices
“Cleats” for winter traction fall into several categories, all applied by a farrier to standard steel or aluminum shoes. Each system trades grip, durability, and joint stress differently, so no single option fits every horse.
The key is matching the right product to your horse’s job, conformation, and the footing you actually encounter. A ranch horse working icy pastures needs something different than a show jumper competing at winter venues.
Four main categories of winter traction devices:
Rim shoes: Steel shoes with a raised inner edge for mild traction on frozen dirt and packed ground
Borium/Drill-Tek: Tungsten carbide-based hard surfacing welded to shoe edges for long-lasting grip on ice and pavement
Removable studs and calks: Screw-in or drive-in metal projections that dig into ice and compacted snow
Traction nails: Specialty horseshoe nails with textured heads that add subtle grip at ground contact
These devices are most common in regions with regular snow and ice—the northern United States, Canada, and northern Europe—and are typically adjusted at each shoeing cycle as conditions change through the season.
All traction devices should be selected and installed by a farrier who understands your horse’s job, conformation, and the surfaces you’ll encounter. This isn’t something to DIY (at least not in the early years of your horsemanship journey).
Rim Shoes and Mild Traction Options
A rim shoe is a steel horseshoe with a raised inner edge—imagine a shallow channel along the shoe's ground-contact surface. When the hoof lands, that raised rim gives a bit of extra bite on frozen dirt and packed ground.
Picture it this way: instead of a flat metal surface meeting the ground, there’s a defined edge that can catch and grip. It’s subtle, but on firm winter paddocks or hard-frozen arena footing, that edge creates friction that a plain flat shoe can’t.
Rim shoes offer mild traction and may work well for horses turned out on firm winter paddocks or ridden lightly on frozen ground. However, they have limits—on polished ice or deep snow, the low profile isn’t sufficiently aggressive to prevent slipping.
Farriers often pair rim shoes with pads or mild traction nails for horses that need “a little more grip” without committing to aggressive studs. This can be a sensible middle ground, especially for horses that stay mostly in controlled environments but occasionally encounter slippery surfaces on turnout.
Borium, Drill-Tek & Other Hard-Surfaced Shoes
Borium and Drill-Tek represent a different approach: instead of adding removable projections, these systems weld or braze hardfacing materials directly onto the shoe. Both are based on tungsten carbide, which rates around 9 on the Mohs hardness scale—meaning they’re extremely resistant to wear.
You’ll commonly see borium on driving horses, ranch horses, and carriage horses working on icy roads or slick paved yards in winter. The material is applied to key contact points on the shoe—typically at the toe and heels— where it provides lasting traction without requiring removable parts.
Advantages of borium:
Long-lasting traction (6-12 weeks under heavy use)
Superior resistance to wear on pavement
Solid grip on ice and frozen ground
No parts to lose or maintain between resets
Drawbacks to consider:
More concussion transmitted to your equine's limbs
Potential for over-traction (limits the natural slide horses need)
Risk of serious injury to other horses if kicked
Added cost and wear on farrier tools
Not easily adjusted once applied
Where the borium is placed on the shoe changes how the foot interacts with the ground. A farrier might put it primarily at the heels for a horse that needs grip during stops, or across the toe for a horse that slips during push-off. This placement should be based on each horse's movement.

Winter “Cleats”: Studs & Calks for Ice and Snow
These are the devices most people picture when they hear “horse cleats”—metal projections attached to the shoe that dig into ice and compacted snow. They come in two main varieties: drive-in and screw-in.
Drive-in studs are permanently driven into the shoe by the farrier. They’re very secure and won’t come loose during use, but they can’t be removed easily without pulling the entire shoe. Once they’re in, you’re committed for the shoeing cycle—typically 5-8 weeks.
Screw-in calks offer more flexibility. The farrier taps threaded holes into the shoe (usually at the heel branches), and you can install or remove studs as needed. This lets you switch between flat shoes for indoor arena work and studded shoes for icy turnout, all without involving your farrier each time.
Many winter studs use carbide tips for longevity. These can often be reused over multiple resets if they haven’t been worn down or damaged. Standard thread sizes (such as 3/8-inch or 1/2-inch) make finding replacement studs straightforward once you know your shoes are tapped for.
Practical considerations for screw-in studs:
Clean stud holes regularly to prevent debris buildup
Use plugs when studs are out to keep threads clear
Check for rust that could make the studs difficult to install
Tighten studs before each ride—they can work loose
Carry a stud wrench and a few spares when needed
The variety of stud sizes available lets you match the traction level to the conditions. Use smaller studs for light frost or packed snow; larger ones for severe ice. Some riders keep a box with several sizes and swap based on what they find when they arrive at the barn.
Traction Nails & Specialty Nails
Traction nails take a subtler approach. These are horseshoe nails designed with textured or carbide-enhanced heads that add small points of grip where the nail head contacts the ground.
The design is clever: pins or layered metal in the nail head expose harder material as the head wears. This means traction actually maintains or even increases over time as the softer outer material wears away. It’s a low-key way to add some grip without the aggressive profile of studs.
However, heavier-shank traction nails create larger nail holes in the hoof wall. For thin-walled or weak-footed horses, this can be problematic. The hoof wall only has so much structural integrity, and larger holes can compromise it.
Farriers often find a middle ground: mixing a few traction nails with standard nails to balance grip against hoof wall health. You might see two traction nails on the outside of each shoe, with regular nails filling the remaining holes.
Compared to studs and borium, traction nails offer subtle traction—think of it as taking the edge off slippery conditions rather than creating aggressive grip. For horses that encounter occasional mild ice rather than constant winter hazards, this may be the appropriate level of intervention.
Performance Horse Cleats: Barrel Racing & Speed Events
Winter isn’t the only time horses need extra traction. In Western and speed events—barrel racing, roping, pole bending—cleats serve a different purpose: helping horses push off and accelerate out of tight turns.
The biomechanics of a barrel pattern are demanding. The horse approaches at speed, slides into the turn for balance, then must grip the ground and drive powerfully out of the turn. Too much slide and the horse loses time or falls. Too much grip and an abrupt stop jars joints and soft tissues.
Performance cleats are engineered specifically for this slide-grip balance on arena footing, such as groomed dirt or sand. Patented designs enable a controlled slide as the horse enters the turn, then progressively grip as weight shifts during the drive phase. It’s precision engineering for a sport where fractions of a second matter.
These cleats change how a horse uses its hindquarters. The added traction allows a more powerful push-off, but it also means muscles and joints experience forces differently than with regular shoes. Correct fitting, training adaptation, and ongoing soundness checks are essential.

A cowgirl guides their horse around a barrel in an arena with dirt footing.
Balancing Slide, Grip & Joint Health
Here’s something that might seem counterintuitive: a complete “no-slide” stop is not what you want for high-speed turns. The limb needs that small slide to dissipate force and protect the horse’s joints and soft tissues.
Think of it like a car’s anti-lock brakes. The goal isn’t to lock up completely—it’s controlled deceleration that prevents damage. The same principle applies to a horse’s legs in a barrel turn.
Too much grip from aggressive cleats on deep or sticky footing increases torque on hocks, stifles, and fetlocks. Studies on event horses have shown that excessive traction can increase stress on sensitive structures like the navicular apparatus by 25% or more. That’s not a trade-off to take lightly.
When introducing performance cleats, go gradually. Your horse needs time to adapt musculally and neurologically to the new feel. What worked in training shoes will feel different—the ground “catches” sooner, and the horse must learn to adjust stride timing and body position.
Warning signs of over-stress after adding cleats:
Short striding or reluctance to extend
Unwillingness to turn in one direction
Heat or swelling in the legs after intense activity
Behavioral changes like ear pinning or resistance to work
Decisions about cleats should be part of a broader performance plan that includes conditioning, foot care, and veterinary oversight. The cleats themselves are just one piece of the puzzle.
Risks, Trade-Offs & When Not to Use Horse Cleats
Any traction aid—from mild nails to aggressive studs—increases the forces transmitted up the limb. There’s no way around this fundamental trade-off. More grip means less natural dissipation of impact energy.
Anatomical structures at risk:
Coffin joint (where the coffin bone meets the short pastern bone)
Pastern joints (both upper and lower)
Suspensory ligament (runs down the back of the cannon bone)
Deep digital flexor tendon (critical for shock absorption)
Hocks (especially during tight turns with sudden torque)
When you stop the natural slide at the stride’s end, limb motion halts abruptly. All that momentum has to go somewhere—and it goes into bones, cartilage, tendons, and ligaments. For horses making tight turns or rapid stops, this stress compounds quickly.
Scenarios where cleats may not be appropriate:
Horses with existing joint disease (navicular, ringbone, arthritis)
Horses with weak or thin-walled hooves
Horses in a very confined turnout on hard surfaces
Riders who mostly stay in safe, well-maintained indoor arenas
Young horses whose joints are still developing
Sometimes the better solution isn’t adding traction to the horse but improving the footing itself. Regularly dragging arenas, using sand in high-traffic gate areas, clearing ice from walkways, or simply adjusting turnout schedules to avoid the worst conditions can be safer than relying on aggressive studs. If you are in the wild and not in a controlled environment like these, you are at the mercy of Mother Nature and the conditions you encounter.
Behavior, Handling & Injury Management with Sharp-Footed Horses
Cleats and sharp studs affect how horses interact with one another and their environment. What might be a glancing blow from a plain shoe becomes a serious puncture wound when that shoe has metal projections. This isn’t theoretical—it’s a real management consideration.
Practical adjustments for cleated horses:
Use deeper stall bedding to cushion any pawing or shifting
Allow extra space on cross-ties to prevent horses from striking each other
Consider leg protection during hauling or turnout with other horses
Be cautious about group turnout; a kick from a studded foot can cause significant damage
Even with your own horse, avoid tight circles or playful lunging on icy, hard ground—the grip can be unpredictable, and a sudden catch can wrench a joint before either of you realizes what happened. Prolonged work on frozen, rutted surfaces adds concussion even when the horse isn’t slipping.
If a horse does injure itself with cleats—whether self-inflicted during turnout or from contact with a surface—clean the wound immediately and assess the depth. Puncture wounds near joints or tendon sheaths are veterinary emergencies. Don’t assume a small wound is minor just because there isn’t much blood.
Practice leading and turning cleated horses slowly on different surfaces. Both you and your horse need to learn how the added traction feels. That moment of surprise when the foot grips unexpectedly can cause a handling incident.
Preventing Snowballing & Using Hoof Pads with Cleats
Snowballing might be winter’s most frustrating hoof problem. It happens when snow packs into the sole and builds up into “ice balls” that lift the horse off its actual foot. Suddenly, your horse is walking on unstable domes of ice, and all that expensive traction hardware becomes useless.
The buildup can happen surprisingly fast. A few minutes in wet, packing snow, and your horse goes from secure footing to stumbling on elevated ice lumps. It’s as dangerous as slick ice, sometimes more so because the height makes the horse clumsy and unstable.
Solutions for snowballing:
Rim pads: Polyurethane edges fitted under the shoe that flex with each step, popping snow and ice out before it can pack
Full snowball pads: Cover the entire sole, creating a convex surface that snow can’t cling to
Bubble pads: Feature a raised center that actively pushes snow out with each stride
These pads can be combined with regular shoes or with traction shoes and studs. However, they require attention—moisture and debris can get trapped between the pad and sole, creating conditions for thrush or other problems if left unchecked.
Daily winter care for padded hooves:
Pick out feet daily, even if the horse isn’t being ridden
Check pad edges for damage or lifting
Monitor for unusual smell or discharge suggesting trapped moisture
Work with your farrier to select pad styles suited to your specific conditions
Not every horse needs pads, and not every pad works for every situation. A horse that lives in a dry lot with minimal snow exposure has different needs than one turned out in deep snow daily. This is another conversation to have with your farrier before winter arrives.
Working with Your Farrier & Building a Winter Plan
Winter traction isn’t one-size-fits-all. It’s a plan developed between the owner, the farrier, and—when needed—the veterinarian. The right approach depends on your horse, your climate, and your usual activities.
Questions to discuss with your farrier:
What surfaces does the horse encounter most (ice, packed snow, frozen ground)?
How often is the horse ridden versus just turned out?
What discipline or type of riding do you do?
How old is the horse, and are there any conformational concerns?
Has there been any prior lameness or joint issues?
What’s the budget for traction options?
Schedule traction changes ahead of the season—October or November in northern climates—rather than waiting until the first major ice storm. Your farrier’s schedule gets crowded when everyone suddenly needs winter shoes after the same freeze event.
Most farriers recommend starting with milder traction and adjusting as needed. There’s wisdom in this approach. You gain experience with how your horse moves on different surfaces, and you can increase traction if needed, rather than starting with aggressive studs that may cause problems.

Monitoring Soundness & Adjusting Through the Season
Once you’ve added traction devices, monitoring becomes part of your routine. This doesn’t require expensive equipment—just attention and consistency.
Simple post-ride soundness checks:
Run your hand down each leg, feeling for heat or swelling
Watch the horse walk and trot in hand; note any shortness of stride
Check the hooves for any stud loosening or pad damage
Keep a simple log of any changes you notice after adding cleats
Reassess traction choices at each reset (every 5-8 weeks, depending on your horse and conditions). Work level changes, footing changes, and even changes in your horse’s fitness level can all affect what makes sense for the next cycle.
The weather in late winter and early spring can be particularly challenging. One day you have ice; the next, you have deep, sticky mud from a thaw; then it freezes again overnight.
During these transitional periods, ask your farrier about setups that handle varying conditions—maybe milder studs that offer some grip without being too aggressive for any single surface.
If lameness or discomfort appears after adding cleats:
The default action should be to reduce or remove traction
Don’t push through, hoping it will resolve
Involve a veterinarian promptly for evaluation
Consider whether the cleats themselves are the issue or if they’re revealing an underlying problem
Life with horses means constant observation and adjustment. Traction devices are just another variable to monitor as the year progresses.
Building Your Knowledge as an Aspiring Horseman
Horse cleats can greatly improve safety and performance when used thoughtfully. But, as with everything in horsemanship, they come with trade-offs that require understanding and attention.
The foundation for any equipment decision—including winter and performance traction—is understanding your horse’s movement, environment, and job. A stud that works perfectly for one horse on one surface might cause problems for another horse on a different surface. That’s not a failure of the product; it’s the nature of working with living animals in variable conditions.
If you’re on a journey of learning and getting a little better each day, we’d love to have you along.
Subscribe to the Aspiring Horseman Weekly Newsletter for real-world lessons, case-based discussions, seasonal checklists, and more that help you stay ahead of conditions instead of reacting to them.
Those 1% improvements stack up. Eventually, we look back amazed at how far we’ve come.